Pong project - paddle
This is an article from the Pong series. Please refer to the Pong project home page if you need more context.
Paddle Requirements
Okay, the Ball is implemented. The next step is to implement the paddle.
Requirements:
- It should respond to player input and move up and down within the playing field.
- The ball should bounce off the paddle.
Based on the above, these requirements translate into the need for collision detection and changing the node’s position. Both are quite easy to achieve, as there are several nodes that handle collisions well: Area2D, RigidBody2D, and CharacterBody2D.
When it comes to moving a node based on player input, any of these types can be used — since position is a property of Node2D.
In the following section, I’ll compare Area2D and CharacterBody2D, as they seem the most appropriate for this task.
RigidBody2D is also a possible choice, especially when developing a physics-heavy game. In the case of Pong, physics is not that important — I’ll explore making Pong more realistic in one of the future posts.
Code examples for this post can be found on the github pong project
Area2D Paddle
Area2D is the most basic node that can be used for the paddle. As a reminder from the Ball post, Area2D nodes can detect collisions with other areas and bodies, but they don’t have physics implemented.
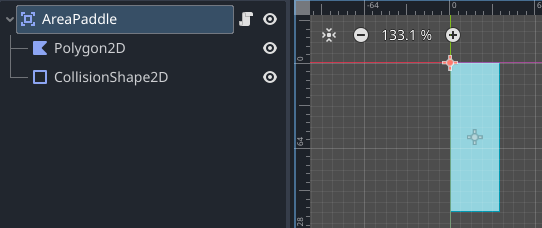
Let’s start by creating a separate scene — I’ve chosen the name AreaPaddle. As child nodes, add a Polygon2D (or Sprite2D) and a CollisionShape2D.
Movement
Now, attach a script to the main node of the scene. Currently, AreaPaddle is static — let’s add movement so the player can control it using the up and down arrow keys.
@export var speed: float = 2048

var velocity = Vector2(0,0)

func _physics_process(delta: float) -> void:
	velocity -= velocity * delta * 5.0        # 1
	if Input.is_action_pressed("ui_up"):      # 2
		velocity.y -= speed * delta           # 3
	if Input.is_action_pressed("ui_down"):
		velocity.y += speed * delta

	position += velocity * delta              # 4
What does it do? It defines speed and velocity, then implements the _physics_process function to handle movement. Let’s break it down:
Ad 1: Decreases velocity by velocity * delta * 5.0.
Why 5? It’s an arbitrary value. What does this line actually do? It makes the AreaPaddle gradually slow down when no button is pressed. Without it, the paddle would keep moving indefinitely in the last direction.
Another approach would be to simply set velocity to 0 when no button is pressed — this would result in a different, more “snappy” control feeling, and it’s something worth experimenting with.
Ad 2: This line checks if a particular action is pressed, in this case the arrow up (it’s configurable, but player controls will be the subject of a separate post).
Ad 3: Velocity is decreased (because movement up requires negative velocity on the Y axis) by speed multiplied by delta.
Ad 4: The position of AreaPaddle is updated by velocity multiplied by delta. This, similarly to #1, is done on every physics tick (it’s not exactly every frame, but close to it).
Please note that while velocity is a node property for nodes like CharacterBody2D, in this case velocity is used only in the script, meaning that changing velocity doesn’t do anything unless the position is updated or something else is done with it.
OK, fine. Now AreaPaddle can be tested using a simple test scene with only the AreaPaddle node to check if player movement is working.
Collisions
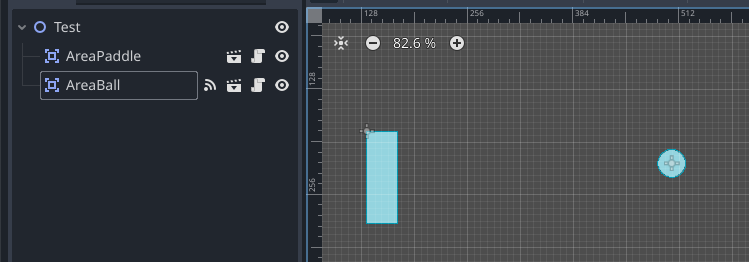
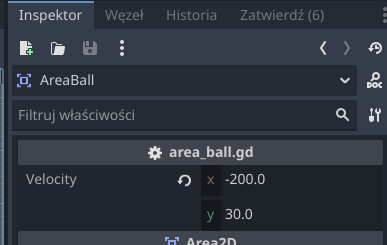
Movement seems fine for a start. What about collisions? I mentioned in the paddle requirements that collision needs to work, right? But in this case, since the paddle won’t be doing anything special when it’s hit by the ball, there’s no code to add — all the collision logic is already handled in the Ball implementation. So… let’s just test it; maybe it will work out of the box? Let’s add AreaBall to the test scene and set its initial velocity so that it moves toward the paddle.
Now let’s play the scene.
It works! Awesome. But why does it work? AreaBall detects collisions using a raycast, which, with an additional setting (query.collide_with_areas = true), also detects other areas. This means the AreaBall implementation handles collisions with both bodies and areas.
Okay, while that seems great, let’s now run a second test with another type of ball and see what happens.
CharacterBall goes through the paddle without bouncing… not good. Maybe RigidBall will work? Same result.

Why is that happening? CharacterBody2D and RigidBody2D use physics for collision detection with other physics bodies. Since AreaPaddle’s base node is Area2D, which is not a physics body, no collision occurs.
How to fix it? I’m sure that with custom code, similar to what’s used in AreaBall with raycasts, proper collision behavior could be implemented… but that kind of defeats the purpose of using physics bodies, right? I think this gives an important lesson for node choice — choose the node type not only based on the requirements of a particular node but also considering the nodes it will interact with.
In our scenario, that means it’s usually best to use physics bodies with other physics bodies, and areas with areas — of course, that applies only to the collision aspect, nothing else.
CharacterBody2D Paddle
Let’s now implement the paddle using CharacterBody2D and evaluate its usefulness for the paddle implementation.
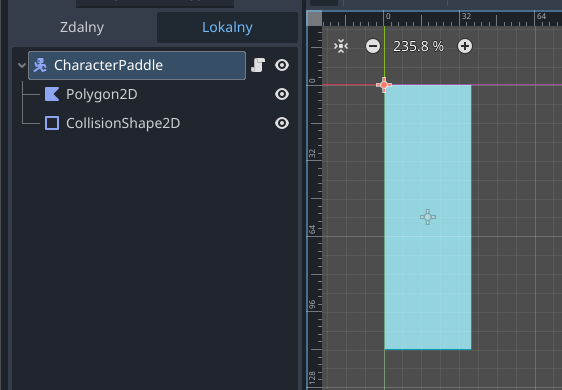
First, create a scene similar to AreaPaddle, but with CharacterBody2D as the base node and name it CharacterPaddle.
Movement
Second step is to implement movement, let’s attach script to the main node and following code:
extends CharacterBody2D

@export var speed: float = 2048

func _physics_process(delta: float) -> void:
	velocity -= velocity * delta * 5.0          # 1
	if Input.is_action_pressed("ui_up"):
		velocity.y -= speed * delta
	if Input.is_action_pressed("ui_down"):
		velocity.y += speed * delta

	move_and_slide()                            # 2
That looks very similar to what was done in AreaPaddle. There are a few minor but important differences:
Ad 1: Slowing down works the same as in the AreaPaddle version. However, note that the velocity variable is not declared in the script — it’s a property of the CharacterBody2D class.
Ad 2: While in AreaPaddle the node’s position was changed directly, when using CharacterBody2D it’s better to call the built-in method move_and_slide() to handle movement. It moves the node according to the current velocity (set before calling the method) and also applies some physics behavior, like sliding when in contact with another body — see the documentation for full details.
What are the alternatives here? You can directly change the node’s position (as in AreaPaddle), or you can use the move_and_collide() method. The latter is a more generic version of move_and_slide() implemented in the PhysicalBody2D parent class of CharacterBody2D.
You might wonder whether move_and_collide() has to be called to handle collisions — good question! In this case, it’s not required because collision handling with the ball is implemented on the ball’s side — see CharacterBall for details.
OK, at this point test scene for CharacterBall can be created to test it’s movement - should work identical to AreaPaddle at this point.
Collisions
Moving on to collisions. If you’ve read the entire post up to this point, you probably expect that no additional code is required to handle the ball bouncing. Let’s test this by creating a test scene with different ball types: AreaBall, CharacterBall, and RigidBall.
Indeed, it works — the balls bounce as expected, with a small distinction for RigidBall: when it collides with the paddle, the paddle is slightly moved, as the ball pushes it back (it might be hard to spot in the GIF above — best to run the scene yourself). This happens because RigidBody2D has more physics simulation behavior, and RigidBall overrides the physics material.
Summary
Wrapping up this post — it described two ways to implement the Paddle. The case of using the simplest node possible (Area2D) provided an important lesson: it’s crucial to consider how nodes will interact with one another.
While the node setup and code are quite similar for both types, there are some consequences to this choice.
AreaPaddle:
- Simple and very performant
- No physics
- Might be difficult to handle collisions with physics bodies
- Works out of the box only with AreaBall
CharacterPaddle:
- Simple; performance may be slightly worse, but this should only be a concern when performance is already an issue or when many instances of the scene are spawned
- Has basic collision (for full physics use
RigidBody2D) - Works with all types of balls: rigid, character, and area
Of course, the node type can be changed at any time, but if a lot of code relies on built-in properties or methods of CharacterBody2D, migrating everything to Area2D might be time-consuming. Migration from a simpler node (Area2D) to a more physics-oriented one should be more straightforward.