Pong project - ball
This is an article from the Pong series. Please refer to the Pong project home page if you need more context.
Let’s start implementating Pong by creating the ball. The ball and paddles are core to the game and need to work flawlessly to provide a good experience to the players.
Project kickoff
As this is the first step, it requires creating a project in the Godot editor. If you need help with that, take a look at the Godot docs.
You can access the code for this project at https://github.com/marcinsendyka/pong. The content of this article can be viewed on the https://github.com/marcinsendyka/pong/tree/tutorials/ball branch.
Ball node choice
OK, so now there’s a decision to make: which Node type should represent the ball? There are two requirements to make it work:
- Collision detection - so some behavior (bouncing the ball) can occur when one object collides with another (the ball colliding with a paddle or wall).
- Movement - the object should be movable (static ball is useless).
Godot has a built-in Node called CollisionObject2D. The node hierarchy is shown in the image below.
 TODO SUPPORT DARK MODE
As you can see, there are a few options to choose from. Let’s try to implement ball behavior using CharacterBody2D, StaticBody2D, RigidBody2D, and Area2D. Other classes are either very specialized (like PhysicalBone2D) or abstract.
RigidBody2D
Description
RigidBody2D was my initial choice for the ball node. It has full 2D physics implemented, so I figured it would be the easiest to use. I do not care about performance in this case, since only one ball will be rendered at any given moment.
Initial setup
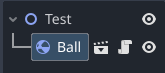
- Create a Test scene.
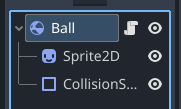
- Create a RigidBall scene with a root note of type
RigidBody2D.- Add
Sprite2DandCollisionShape2Das child nodes. - Load the
ball.pngtexture and a matching collisionCricleShape2D.
- Add
- Instiantiate the RigidBall scene in the Test scene and drag the ball to the middle of the viewport.
Okay, now let’s run the Test scene. Okay.. the ball is affected by gravity and falls down and off the screen. Overall, this behavior is normal for physics, but not suitable for the Pong game.
Disabling the gravity
To adjust it for the game, do the following:
- Open the RigidBall scene.
- If you want to change it only for the single ball instance instead of the whole scene, then you should select the instianited ball in the Test scene.
- Select the root node.
- In the inspector find
RigidBody2Dpane, then locate Gravity Scale setting. - Set Gravity Scale to 0.
- Rerun the scene
Now the ball is not moving at all. That might work, however, using a node with physics implemented solely only to disable part of it seems a bit off, but let’s see how it goes next.
Adding movement
Since the ball is not moving, there is a need to add code to impart some motion to it. Because RigidBody2D is a physics object, a force is applied instead of directly setting its velocity.
Attach the following script to the RigidBall scene:
extends RigidBody2D

func _ready() -> void: // 1
	apply_central_impulse( // 2
		Vector2(200, 0) // 3
	)
Ad 1: Using the _ready function, which means that the code in its function body will run only once, when the ball node is initialized and enters the scene.
Ad 2: A built-in method of the RigidBody2D class that applies force without causing rotation.
Ad 3: An example vector that points to the right side of the screen. If you are not familiar with vectors, please refer to this guide and experiment with different values to get a feel how changing the x and y components impacts the ball’s movement.
Now, if you run Test scene, the ball should move horizontally to the right until it leaves the viewport.
Handling collisions
Let’s test what happens when the ball makes contact with another object, whather it will be a field border (in Pong, the ball bounces when it reaches the top or bottom of the playing field) or a paddle.
Create test scene borders
Let’s add some StaticBody2D nodes for the ball to collide with:
- Open the Test scene.
- Add
StaticBody2Dnode with two children:ColorRectandCollisionShape2D.- Configure the
ColorRectby setting its desired size and placement. - Configure the
CollisionShape2Dby adding aRectangleShape2Din Inspector -> CollisionShape2D -> Shape and adjust the shape to match theColorRect.
- Configure the
- Add three more walls so the ball is enclosed in a box.
- See the image below for example how it might look. You can notice that my box doesn’t look very pretty, but that’s intentional - this is prototyping, and as a good practice, we shouldn’t dwell on unncessary details.
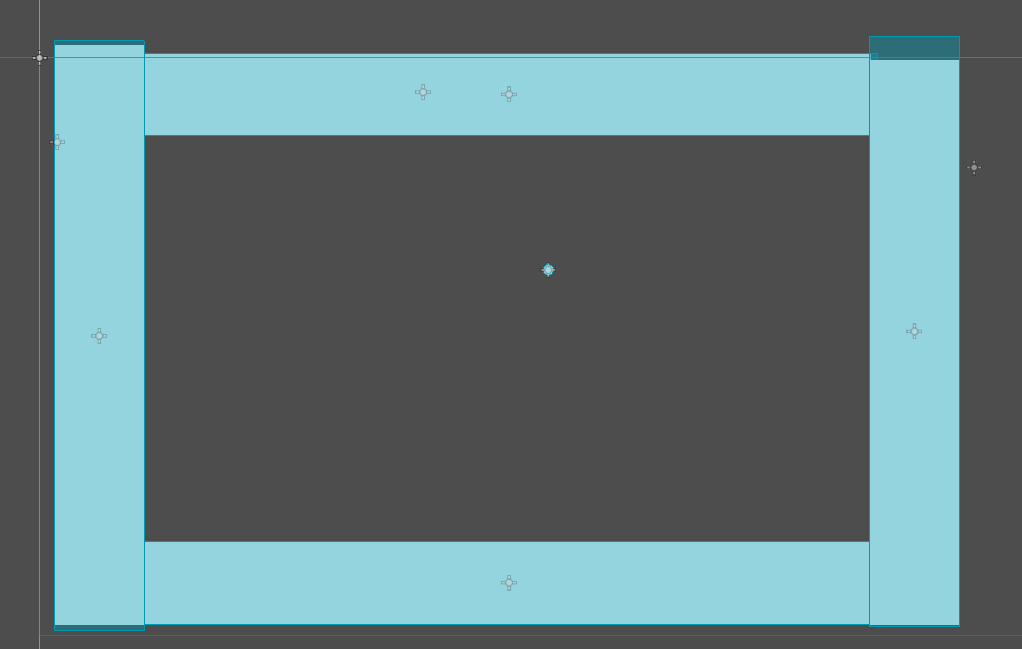
–
Once the Test scene is run, you may notice that ball moves until it reaches the wall and then stops moving. That’s unforunate - it definetely isn’t how the ball in Pong should behave.
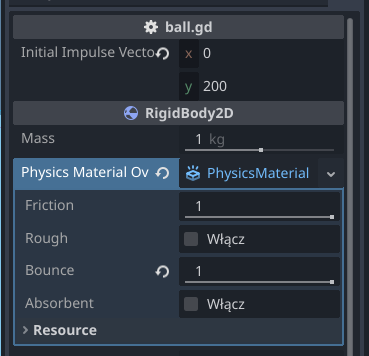
To fix this, one approach is to set the Bounce property to 1. To do this:
- Select the ball instance in the Test scene.
- Find the Physics Material Override setting under
RigidBody2D. - Click on
and select New physics material. - In setting for newly created material, set Bounce to 1.
Now, this works much better - the ball is actually bouncing. However, after a few bounces, the ball loses speed. Why is that? Because on each bounce, the ball loses some energy. Here is an excerpt from the Bounce property documentation:
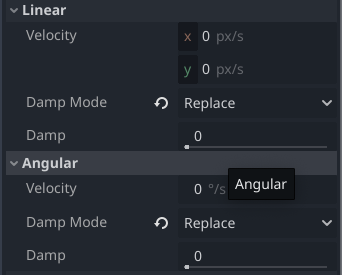
Note: Even with bounce set to 1.0, some energy will be lost over time due to linear and angular damping. To have a physics body that preserves all its energy over time, set bounce to 1.0, the body’s linear damp mode to Replace (if applicable), its linear damp to 0.0, its angular damp mode to Replace (if applicable), and its angular damp to 0.0. Source
One last thing - Friction property of the Physics Material has to be set to zero, otherwise the ball will also lose some energy when colliding with an object.
RigidBody2D summary
With those changes, the ball finally behaves almost as I envisioned when I started the project. However, since RigidBody2D implements full physics, which isn’t really necessary for the Pong - following changes had to be made:
- Disable gravity.
- Add initial motion from code (
apply_central_impulse()). - Set bounciness by overriding the Physics Material.
- Set Damp Mode to Replace for both Linear and Angular.
- Set Friction to zero.
StaticBody2D
Actually, this one will be short. After experimenting with different options for a while, I found that this node is not very useful for implementing the ball - which is expected given its name. I had issues detecting when one StaticBody2D (the ball) collide with another (the wall), so I decoded to skip that approach. If you think otherwise, please let me know!
CharacterBody2D
Next, let’s try using CharacterBody2D. Offical docs describe it as:
CharacterBody2D is a specialized class for physics bodies that are meant to be user-controlled. They are not affected by physics at all, but they affect other physics bodies in their path. (…)
Even if ball won’t be controlled by the user, I think it’s more suitable to be used for the ball than RigidBody2D - because of the not affected by physics at all part. Downside is that collisions has to be handled in code, but thanks to helped methods it is very straightforward.
Initial setup
- Create the CharacterBall scene with root note
CharacterBody2D.
- Add
Sprite2DandCollisionShape2Das child nodes. - Load the
ball.pngtexture and a matching collisionCricleShape2D.
- Create a test scene. RigidBody2D setup can be reused.
- Instiantiate the CharacterBall scene in the Test scene and drag the ball to the middle of the viewport.
OK, let’s test it. Running the test scene shows that ball is not moving - great, no need to deal with gravity.
Adding movement
All movement has to be added in code, so let’s attach a script to the root node of CharactedBall scene with the following content:
extends CharacterBody2D

const SPEED = 300.0

func _ready() -> void:
	velocity = Vector2(SPEED, SPEED) # 1

func _physics_process(delta: float) -> void:
	move_and_slide() # 2
  # move_and_collide(velocity * delta) # 3
Ad 1: Ball won’t move by itself, so velocity is directly set. It’s similar approach to the one used for RigidBody2D.
Ad 2: Setting velocity is one thing, but to make CharacterBody2D move, either move_and_slide() or move_and_collide(velocity * delta) has to be called.
Handling collisions
Try running test scene with uncommented line #2 and second time with line #3 uncommented and compare the results. For move_and_slide() collision will be handled automatically and the ball will slide along the wall. move_and_collide method doesn’t handle collision automatically and it has to be handled in the game code. Let’s add collision handling:
func _physics_process(delta: float) -> void:
    # 1
	var collision_info: KinematicCollision2D =  move_and_collide(velocity * delta)
    # 2
  if collision_info:
    # 3
		velocity = velocity.bounce(collision_info.get_normal())
Ad 1: move_and_collide method returns the KinematicCollision2D in case any collision happens.
Ad 2: Bounce should happen only when collision has happened.
Ad 3: Vector2.bounce() helper method returns Vector2 which now replaces previous velocity value.

Now the ball bounces as expected and it looks fine. One issue I have with current behaviour is that bounce angle is always the same, so the ball’s initial velocity vector remains unchanged—only its direction is reversed upon bouncing (see below). This can result in a rather boring game. To demonstrate this better, please see the logged velocity from playing Pong (every time the ball bounces off the paddle or the wall, the velocity vector is logged:
(-300.4239, 249.4905)
(-300.4239, -249.4905)
(-300.4239, 249.4905)
(300.4239, 249.4905)
In the extreme scenario, when velocity.y is equal to zero (meaning the ball is moving purely horizontally), players won’t need to move their paddles, and the ball will bounce of them infinitely, which will basically ruin the game.
How to solve that? I think it requires some experimenting with different approaches and see what works best for the experience. Few options I can see:
- Randomize angle on collision (it’s actually what the original Pong does).
if collision_info:
  	velocity = velocity.bounce(collision_info.get_normal())
  # adds to velocity random value from -50 to 50
  	velocity.y = velocity.y + randf_range(-50, 50)
- “Simulate friction” by checking collider velocity and based on that changing the ball velocity:
...
var collider_velocity = collision_info.get_collider_velocity().normalized()
if collider_velocity.y != 0:
  velocity.y = velocity.y + 100 * collider_velocity.y # -100 or 100 depends on the y direction
- Mix of the two above.
By applying the ideas above, the game feels much more realistic, and it actually starts to become fun.
CharacterBody2D summary
So, is CharacterBody2D a good choice for Pong’s ball? I think it is, since it’s easy to replicate the original Pong behavior. It definetely took me less time to set it up than when I used RigidBody2D.
When to choose CharacterBody2D:
- When only simple physics-like mechanics are needed and can be easily implemented.
- When collision detection is needed.
When not too choose CharacterBody2D:
- When mechanics should be as realistic as possible - in that scenario, probably it’s easier to fine-tune
RigidBody2D - When collision detection is not needed.
Area2D
Area2D Official docs can detect collisions, however it has to be moved manually. That means position has to be set every frame in the _process function. That’s okay, it’s easy to do:
@export
var velocity = Vector2(200,200)

func _process(delta: float) -> void:
	position = position + velocity * delta
Handling collisions
Handling collisions, that is something where I struggled to progress. Initially I wanted to use area_entered and / or body_entered signals, but couldn’t make this work. Then I used Raycast in the _physics_process function to check whether ball is about to collide with a body. In case there is another body within current position and velocity times delta from the ball, then collision has to be handled. Code to handle collision is similar as in CharacterBody2D, also has the same limitations.
func _physics_process(delta) -> void:
	var collision = move_and_check_collision(global_position, velocity * delta)
	if collision: # handling collision
		var normal = collision.normal
		velocity = velocity.bounce(normal)
	position += velocity * delta # normal movement

func move_and_check_collision(position: Vector2, delta_move: Vector2):
	var space_state = get_world_2d().direct_space_state
	var query = PhysicsRayQueryParameters2D.create(position, position + delta_move)
	var result = space_state.intersect_ray(query) # checks if there is body in front of the ball
	if result:
		return result
	return null
One thing to mention is that this implementation works worse than CharacterBody2D. I noticed that the ball bounces slightly late, meaning it overlaps with the wall for a brief moment. I’m sure this can be fixed—or at least improved—by adding more code, but at this point, I’ve decided not to continue down this path.
Update
Note from the future :) Raycast by default work for bodies and not for areas. To make it detect other Area2D, following code has to be used:
var query = PhysicsRayQueryParameters2D.create(...)
query.collide_with_areas = true
Second thing, previously I have mentioned that it doesn’t work perfectly. I found changing Raycast to vector to slightly longer, make it work perfect (at least in this case).
# change this
var collision = move_and_check_collision(global_position, velocity * delta)
# to this, or try other multipliers
var collision = move_and_check_collision(global_position, velocity * delta * 4)
Summary
OK, let’s try to draw some conclusions based on all these nodes—and how this big chunk of text might actually be useful. 😄
Exploring the different available nodes gave me more confidence in choosing the right one for a specific purpose. Hopefully, you find this useful too.
My key takeaways:
RigidBody2Dis very powerful and offers many possibilities, but it’s hard to master. Use it when you want realistic physics.CharacterBody2Dhas convenient built-in methods for handling collisions, movement, etc. Use it when you need collision handling but don’t require complex physics.Area2Dis quite low-level—great for detecting collisions, but not for handling them (though I might need to review that again). Use it for simple setups or when you want to implement most behaviors manually.
Appendix - recreating original Pong ball
Originally, the Pong game didn’t have any complicated physics—when the ball touched the paddle, its velocity vector was simply reversed and the angle was randomized. This behavior is actually implemented in Godot’s official Pong demo project.
In the _ready function, the ball’s direction is set based on the node’s name (which I’d call an antipattern—it would be better to export a variable or simply multiply direction.x by -1). Then, when the ball hits the paddle in the on_area_entered function, the _ball_dir variable is used and direction.y is randomized using the randf() function.
func _ready() -> void:
	var n := String(name).to_lower()
	_up = n + "_move_up"
	_down = n + "_move_down"
	if n == "left":
		_ball_dir = 1
	else:
		_ball_dir = -1
(...)
func _on_area_entered(area: Area2D) -> void:
	if area.name == "Ball":
		# Assign new direction.
		area.direction = Vector2(_ball_dir, randf() * 2 - 1).normalized()